How to Install MusicGen AI in Local (Download in PC)?
Today, I’m going to guide you through the process of installing and using MusicGen, a remarkable open-source AI tool that lets you create incredible music with just a few simple steps.
You can do it all on your own computer, and it’s completely free. If you’re a musician or a content creator, MusicGen can be a valuable addition to your toolkit.
MusicGen is an open-source language model that can generate high-quality music from either a line of text or a bass melody created by Facebook.
Prerequisites:
Before we get started, make sure you have the following prerequisites in place:
1. Windows Operating System (Linux and Mac users, please note that this tutorial is Windows-specific).
2. A decent GPU (16GB VRAM is recommended, but we’ll discuss how to use it with lower VRAM or without a GPU).
3. Git (for downloading the MusicGen repository).
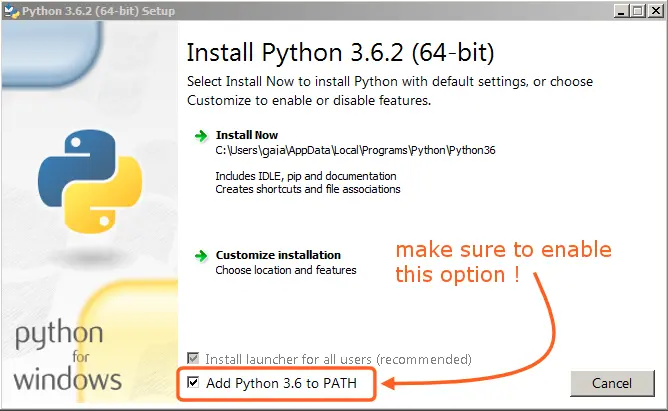
4. Python (make sure to check the “Add Python to PATH” option during installation).
5. PyTorch 2.0.1 (we’ll cover how to install it properly).
6. An empty folder on your computer to store MusicGen files.
How to Install MusicGen AI?
To get started with MusicGen AI, simply visit the GitHub repository at facebookresearch/audiocraft and use the command git clone https://github.com/facebookresearch/audiocraft.git in your terminal or command prompt to download the required files.
Follow the below process:
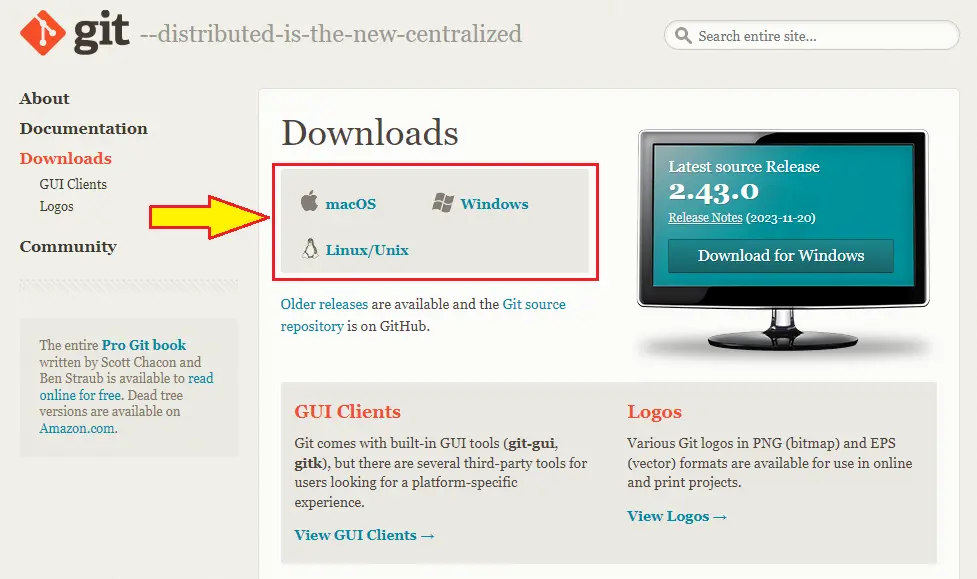
Step 1: Download Git and Python:
If you haven’t already, you need to install Git and Python.
Here’s how:
Go to the Git download page, click on “Download for Windows,” and follow the installation prompts.
Next, download Python for Windows from the official Python website and make sure to check the “Add Python to PATH” option during installation.
Step 2: Install PyTorch 2.0.1:
Now, let’s get PyTorch installed. Follow these steps:
Open your command prompt (CMD) and copy-paste the following command to uninstall any existing PyTorch versions:
pip uninstall torch torchvision functorch tinycudann
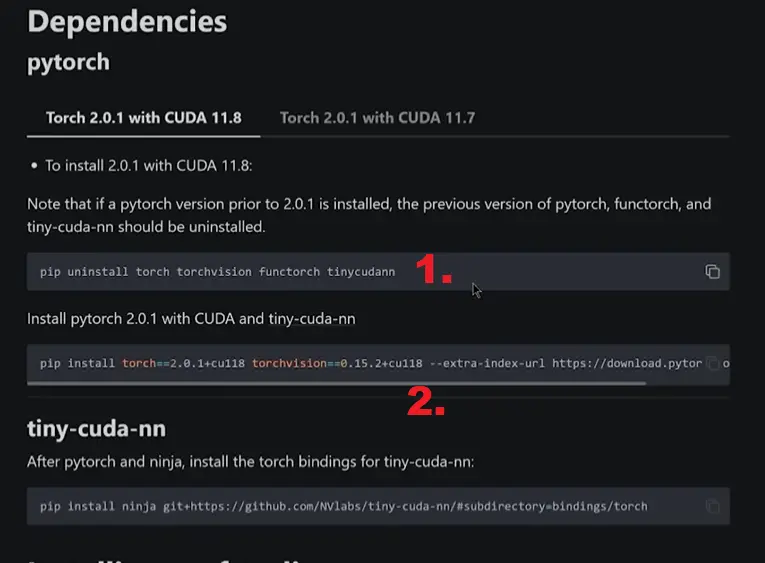
After the uninstallation is complete, paste this command to install PyTorch 2.0.1 with CUDA support:
pip install torch==2.1.2+cu118 torchvision==0.16.2+cu118 --extra-index-url https://download.pytorch.org/whl/cu118
This ensures you have the right version installed for MusicGen.
Pytorch Official installation is here.
Step 3: Clone the MusicGen Repository:
Now, let’s get MusicGen on your computer. Follow these instructions:
Create a new folder on your computer (you can name it “MusicGen” or anything you like).
Inside this folder, open a CMD window by pressing Shift + Right-click and selecting “Open PowerShell window here” (Note: It might say “Open Command Prompt” instead).
In the CMD window, copy-paste the following command:
git clone https://github.com/facebookresearch/audiocraft.git
This will clone the MusicGen’s “AudioCraft” named repository into your newly created folder.
Step 4: Install MusicGen Requirements:
We’re almost there! Let’s install the requirements:
In the CMD window you opened previously, navigate to the “AudioCraft” folder inside your “AudioCraft” folder.
Now, copy-paste this command to install the required dependencies:
pip install -e .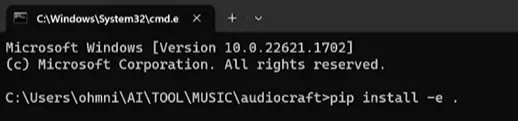
Step 5: Launch MusicGen Web UI:
Let’s launch MusicGen’s web user interface (UI):
In the same CMD window, enter the following command:
python app.py
You might see a “Triton” error; don’t worry; this won’t affect the tool’s functionality.

Look for the local URL displayed in the CMD window, hold Ctrl, and left-click on it to open the MusicGen UI in your web browser.
Step 6: Create AI-Generated Music:
You’re now inside the MusicGen UI, ready to create your music.
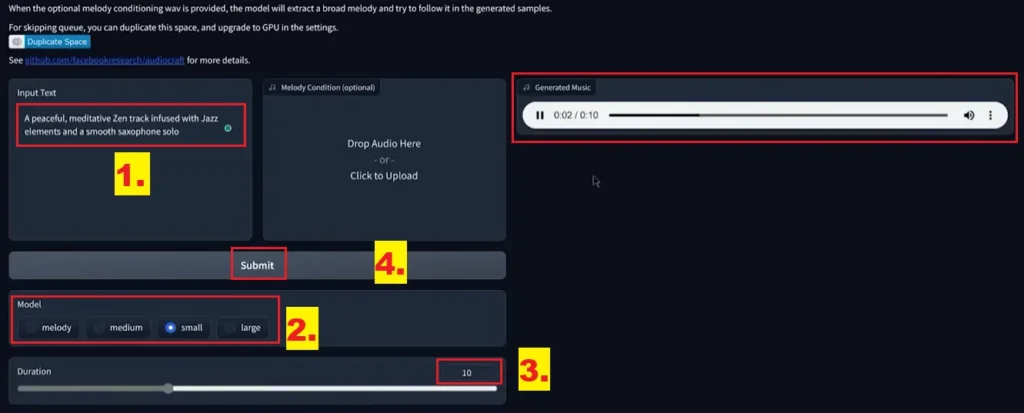
Here’s how to do it:
- In the text input box, describe the type of music you want to generate.
- Select a music model (small, medium, or large) based on your GPU’s VRAM.
- Choose the desired music duration (up to 30 seconds).
- Adjust parameters like top K, p, and temperature to fine-tune the generation if you like.
- Click the “Submit” button to start the music generation process.
Step 7: Download Your AI-Generated Music:
Once the music is generated, you can listen to it in the MusicGen UI.
To download it, click on the download icon.
Running MusicGen Without a Powerful GPU:
If you don’t have a powerful GPU or enough VRAM, you can use Google Colab for free.
Here’s how:
Click the link in the description to access a pre-configured Google Colab notebook.
Follow the instructions to run MusicGen within Google Colab, just like you would on your local machine.
Conclusion:
You’ve successfully installed and used MusicGen to create incredible AI-generated, copyright-free music. Whether you’re a content creator looking to enhance your videos or simply a music enthusiast experimenting with creative tunes, MusicGen opens up exciting possibilities.
- MusicGen AI: Text to Music Transformation

- MusicGen API: Generate Melodies with Replicate

- MusicGen Google Colab Quick Tutorial

- MusicGen AI Architecture Explained: All You Need to Know
Demi Franco, a BTech in AI from CQUniversity, is a passionate writer focused on AI. She crafts insightful articles and blog posts that make complex AI topics accessible and engaging.